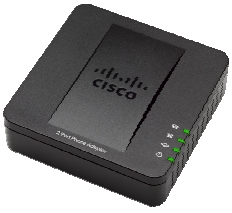
Cisco SPA112 Phone Adapter

Make sure to install the latest firmware from http://www.cisco.com/go/smallbizvoicegateways.
Version 1.1 or later should be used for proper Caller ID support.
Configuration Details
Step 1
Attach the Cisco SPA112 to your network and attach an analog phone to one of the phone ports, then do the following: Dial **** from the phone, even though there is no dial tone. When you hear "System Configuration Menu," dial 1 1 0 # slowly. The current IP address will be read back.
If you hear 0.0.0.0, check your network connection and DHCP server. If necessary, a static IP address
can be assigned by using option 111# at the IVR, then entering the IP address with your phone's keypad
(for example, 10*1*27*2 for 10.1.27.2). The network mask can be set with option 121# and the default
gateway can be sent with option 131#
Learn more about the IVR menu options from the https://supportforums.cisco.com/docs/DOC-9900 document.
Step 2
Open your web browser and go to the IP address you obtained in step 1 (for example, http://10.1.27.1). The default username is admin, and the default password is also admin.
Step 3
Go to Quick Setup and configure Line 1 as follows:
Proxy: server_location.voip.ms
Display Name: Your name
User ID: Your VoIP.MS SIP Account number (or subaccount)
Password: Your VoIP.MS SIP Password
Dial Plan: (911S0|[2-9]xxxxxx|1[2-9]xx[2-9]xxxxxxS0|[2-9]xx[2-9]xxxxxxS0|*xx|*xx.|[3468]11|822|0|00|[2-9]xxxxxx|4xxx|**275x.|xxxxxxxxxxxx.)
(note: replace 555 in the dial plan with your area code)
Click Submit to save settings.
Step 4
Click on Voice, then Line 1
Set NAT Mapping Enable to Yes, then set NAT Keep Alive Enable to Yes. If your environment does not use NAT, you can leave these settings disabled. These features can usually be disabled on the SPA122 if it is connected directly to your modem since its' traffic will not be subject to NAT in this configuration.
Under Proxy and Registration set Register Expires to 180, Proxy Fallback Intvl to 180
Also confirm the following settings:
Use DNS SRV: NO
DNS SRV Auto Prefix: NO
Click Submit to submit these changes
Step 5
Click Network Setup, then go to Basic Setup, then click Time Settings
Set your time zone and (optional) NTP settings. A good time server choice is 0.pool.ntp.org. Setting the proper time zone will ensure that the time which appears on your Caller ID display is correct.


